
In this series of articles, we’d like to take you through a complete rewire at a property in West Didsbury, Manchester, to show you what’s involved at the first fix stage. Our customer is having a wide range of high quality products installed, and it provides a good idea of some of the range of installation services we provide.
This second part covers smart heating control, and underfloor heating installation using Heatmiser and Heatmat. We also install a Texecom alarm system, and a Hikvision CCTV system in this property: both these allow for remote access to monitor from a remote location.
Make sure to read pt 1 of this series, where we cover lighting installation, from manufacturers such as Astro and Collingwood, and lighting control from Lutron. As always, please don’t hesitate to get in touch if you would like to discuss something similar for your business or home.
Issues with installing Underfloor Heating Controls
There are 2 types of underfloor heating being installed in the property: wet and dry (electric heat mat). The underfloor heating in the kitchen area being a relatively large area compared with the bathrooms (which we’ll talk about in a moment) will be of the wet variety. This means that heating will come from the property’s combi boiler. It is more efficient to heat larger areas using a boiler in this manner, rather than the electric equivalent.
The wet heating will be controlled throughout via Heatmiser products. The underfloor heating loop, along with the loop for each individual radiator will come back to a single manifold located in a cupboard under the stairs. The manifold/heating valves will be controlled via a Heatmiser UH8RF unit: each individual loop can be opened or closed to provide targeted heating, and therefore, save you a lot of money in the long run.
A standard home might only have 1, or maybe 2 heating loops. A single thermostat controls the heating for the entire property – very inefficient. Because this property has been taken back to brick, and all flooring removed, we were able to run fresh pipes to each room to supply a radiator.
Each room can then have its own Heatmiser thermostat controlling the radiator; these thermostats are also controllable via the Heatmiser Neo app from both in and away from the home. We will therefore have around 7 heating loops in this property.
In the process of re-piping the radiators, we used PVC pipe. The benefit of this is that being extremely flexible it is possible to use single runs with no joints needed. This makes the chances of leaks occurring under flooring next to nothing. All connections are accessible at one location at the manifold, making future maintenance much more straightforward.
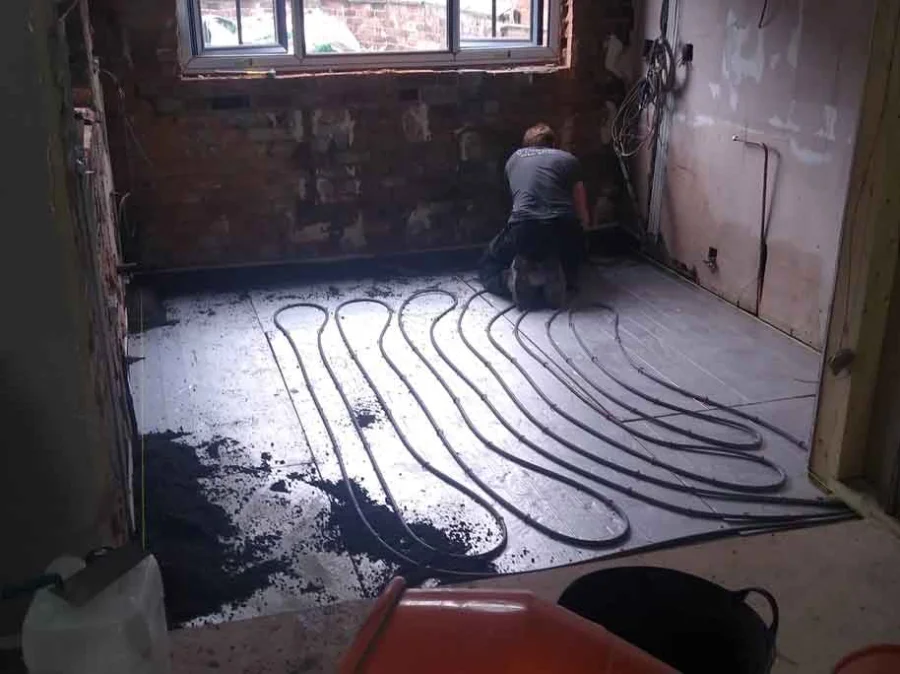
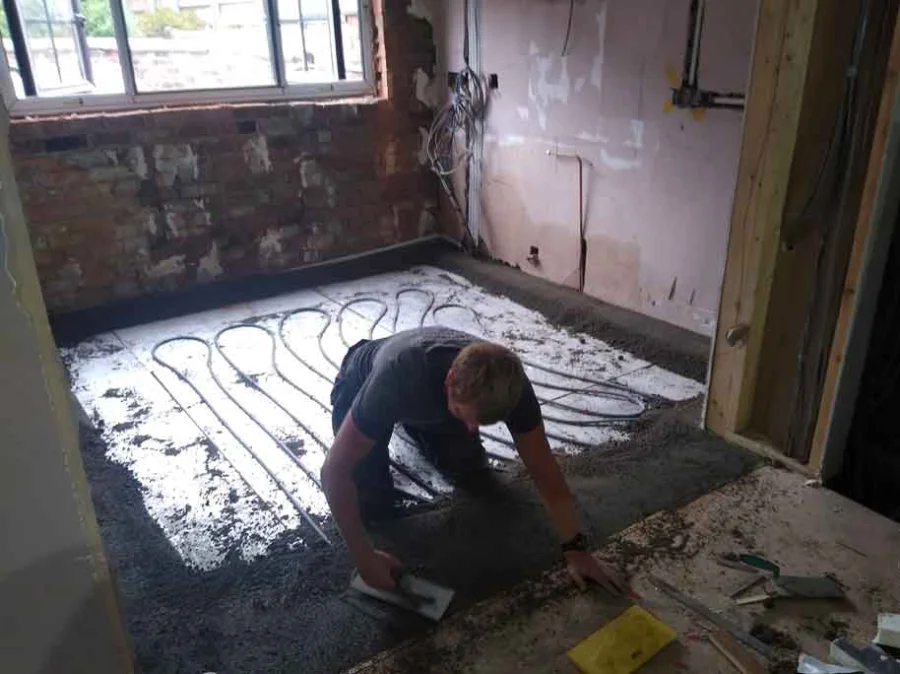
In the kitchen, pipework is laid and clipped on a thick layer of Kingspan insulation. A screen is then applied to cover the pipework (and to help level the floor); a floor probe is then chased into the screed to provide a ground temperature reading for the thermostat. The thermostats also have air temperature sensors built in: preferences can be set on the stat to decide which sensor provides temperature information. In the photos you’ll see that the pipework is not laid under where the kitchen cupboards will sit – heating under this area isn’t necessary.
In the next instalment, we’ll have a look at the second fixing of the wiring centres and thermostats.
Laying the Electric Heat Mat
There’s no doubt that electric heat mat is an easier, quicker product to fit compared with a wet underfloor heating system. The downside is that of the two, heat mat has the potential for more problems. Because wet underfloor heating is essentially a sealed system under the floor, there is nothing that can go wrong. Electric heat mat is essentially a heating element – in other words it has a slightly more finite life-span than the wet equivalent.
Great care must also be taken with the installation process: it can be damaged easily and if this is not monitored carefully, it may be that floor coverings have to be taken up to replace the mat. Your installer should take measurement of the resistance and insulation resistance of the mat and compare them with manufacturer’s data before, during and after the installation. You should be provided with these details along with your installation certificate.
The positives of installing heat mat, alongside those mentioned above, is that it is cheaper; rolls of different surface area can be purchased off the shelf, (for example 4m², 8m² etc) and easily shaped to fit the profile of your room. The heating is more instantaneous – great for small rooms such as the bathroom and en-suite rooms we’ve used it for in this property.
In the pictures you can see Paul first laying the insulating board underneath the mat. The mat is then rolled out: the black mesh can simply be cut with scissors to allow you to fit it to the profile of the room. Finally the edges are taped in place. The floor covering can be immediately laid – in this case it will be some contemporary black tiles (photos to follow), no waiting around for screed to go off etc.
In the next instalment, we’ll take a look at some of the second fixing of lighting including several lighting control centres we’ve created, and some of the lovely Astro lights we’ve used. We’ll also take a look at first fixing of the CCTV and alarm cabling.
